How to Prune Roses
Stop Ruining Your Roses: How to Prune Them Properly in Late Winter
Pruning roses can feel intimidating—but it’s one of the most important things you can do to ensure strong growth, healthy plants, and incredible blooms.
The good news? Once you understand a few simple principles, it becomes one of the most satisfying jobs in the garden.
In this guide, I’ll walk you through exactly how to prune your roses in late winter so you set them up for their best season yet.
Why Late Winter Is the Perfect Time to Prune Roses
Late winter is the sweet spot for pruning because your roses are still dormant—but just about to wake up.
At this stage:
- The structure of the plant is clearly visible
- You won’t accidentally remove new growth
- Pruning stimulates strong spring growth
If you prune too early, frost can damage fresh cuts. Too late, and you risk removing new shoots.
.
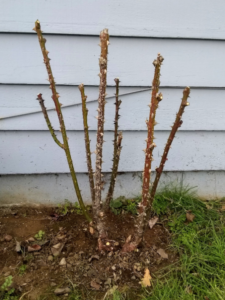
Step 1: Start by Really Looking at Your Rose
Rose pruning overview
Before you make a single cut, take a step back.
Look for:
- Dead or damaged wood
- Crossing branches
- Weak, spindly growth
- The overall shape of the plant
This moment matters more than people think—good pruning starts with observation, not cutting.
Step 2: Remove Dead, Damaged, and Diseased Wood
Your first cuts should always be the obvious ones.
Remove:
- Brown, brittle stems
- Blackened or diseased wood
- Anything clearly not viable
Cut back to healthy wood (you’ll see green inside the stem).
This instantly improves airflow and reduces disease risk.
Step 3: Eliminate Crossing and Inward-Growing Stems
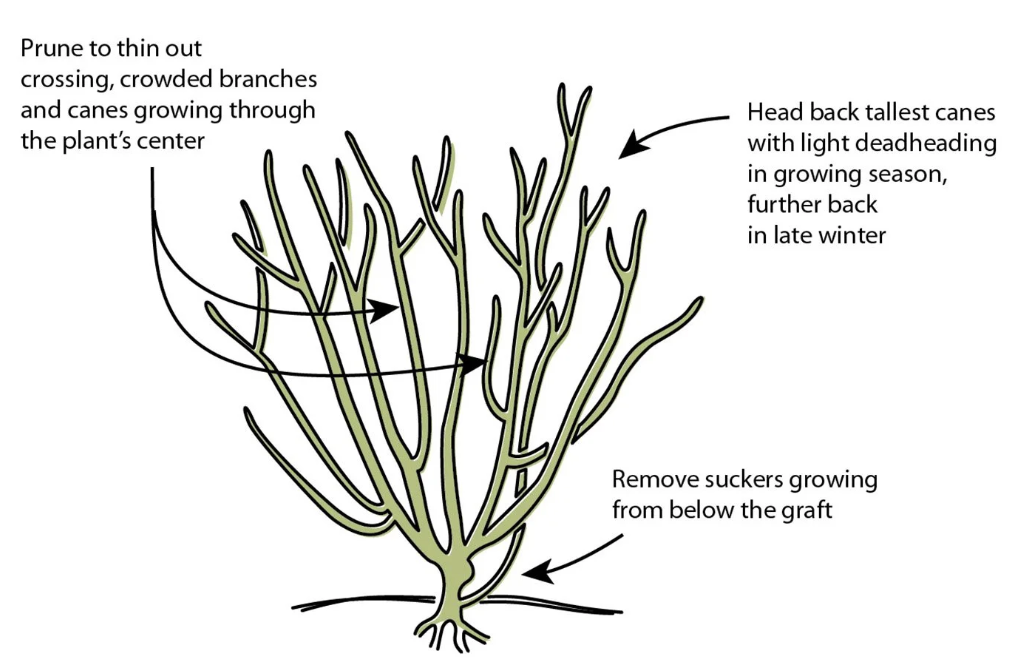
Crossing branches
Branches that cross or rub against each other cause damage and create entry points for disease.
Aim for:
- An open, airy center
- Branches growing outward
- No congestion in the middle
Think of it like creating a vase shape—light and air should move freely through the plant.
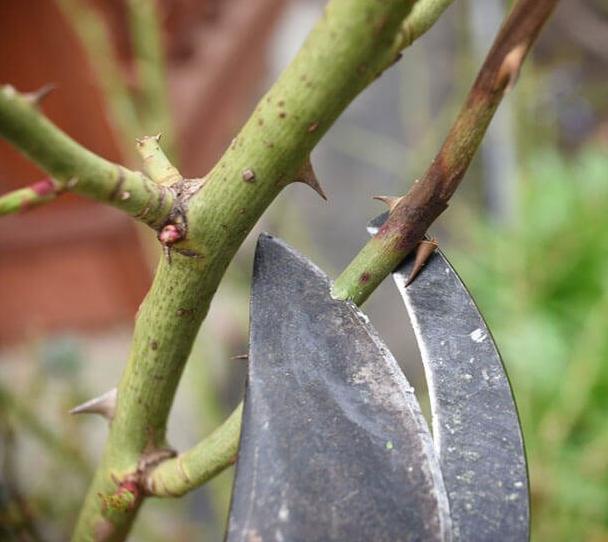
Step 4: Cut Back to Strong, Healthy Growth
Healthy pruning cuts
Now comes the shaping.
Cut back stems to:
- An outward-facing bud
- A strong, healthy section of the stem
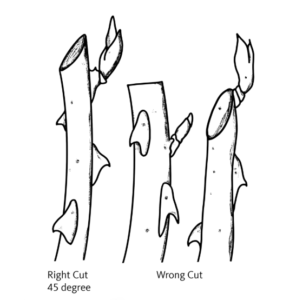
Make your cut:
- About ¼ inch above the bud
- At a slight angle
This encourages new growth to grow outward—not inward.
Step 5: Don’t Be Afraid to Be Bold
This is where most gardeners hesitate—and where mistakes happen.
Roses are incredibly resilient.
You can often remove:
- Up to ⅓ (or even more) of the plant
And it will come back stronger.
Light pruning leads to weak, leggy growth. Bold pruning leads to vigorous, healthy plants.
What Happens Next?

After pruning:
- New shoots will emerge from the buds you selected
- Growth will be more structured and balanced
- You’ll get better airflow and fewer disease issues
And ultimately… more flowers.
Final Thoughts: Pruning Is an Act of Confidence
Pruning roses isn’t about perfection—it’s about intention.
Once you understand:
- What to remove
- What to keep
- And why it matters
…it becomes less about fear and more about shaping the plant for success.

Watch the Video
Get the Free Guide
Free Garden Resource Library
Get instant access to all of our guides.
Thank you!
Check your email in a moment for your Garden Resource Library access.
Want More Practical Garden Guidance?
Explore more at Our Magical Garden on YouTube where we focus on:
- Real-life gardening (not perfection)
- Seasonal rhythms
- Building a garden that works with nature