The Ultimate Guide to Edging Garden Beds
Why It Matters, How to Do It Properly, and Choosing the Right Approach for Your Garden
There are certain jobs in the garden that feel small while you’re doing them… but completely transform the space once they’re done.
Edging is one of those.
It doesn’t involve new plants or dramatic redesigns.
But it is often the difference between a garden that looks accidental… and one that feels intentional, structured, and quietly resolved.
And once you notice it, you start to see it everywhere.
The Hidden Structure of a Garden
When you step back and look at a garden, what you’re really seeing isn’t just plants.
You’re seeing boundaries.
Where lawn meets border.
Where path meets planting.
Where one space gives way to another.
Edging is what defines those boundaries.
It creates clarity. It frames planting. It gives the eye somewhere to rest.
Without it, a garden tends to drift—grass creeps in, mulch spills out, and the whole space softens into something less defined.
With it, everything sharpens.
Why Edging Matters (Beyond Aesthetics)
1. Visual Structure
It creates clean, readable lines that make a garden feel designed—even if the planting itself is loose and natural.
2. Separation of Materials
It keeps lawn, soil, gravel, and mulch where they belong.
3. Reduced Maintenance
A well-defined edge slows grass encroachment and makes mowing easier and cleaner.
4. Long-Term Stability
In more permanent edging systems, it helps prevent shifting, erosion, and spread of materials.
But ultimately, the real value is this:
It brings intention into the space.
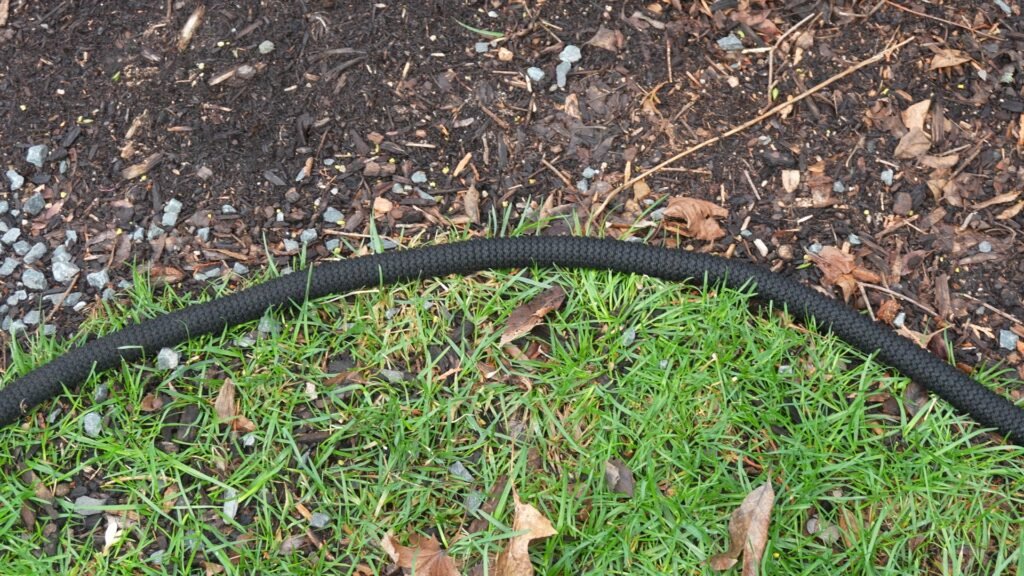
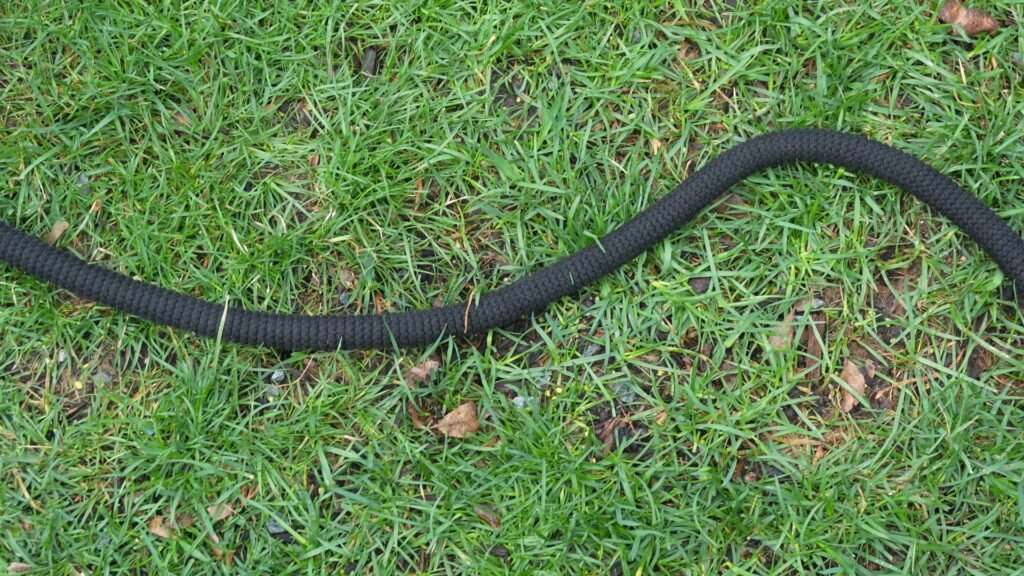
Before You Begin: Designing the Line
Where the edge goes.
A simple and effective method is to lay out a hose or rope along the border.
Then step back.
Look at it from different angles. Walk past it. Adjust it.
What you’re aiming for is a line that feels:
- Smooth
- Confident
- Natural to the space
What to Avoid
- Tight, fussy wiggles
- Constant small corrections
- Overly complex shapes
A good rule of thumb:
Fewer, broader curves will always look better than lots of small ones.
Because no matter how neatly you cut it, a nervous line will always feel uncertain.
The Main Types of Garden Edging
1. Natural Spade Edge (Cut Edge)
Best for: Cottage gardens, informal planting, naturalistic spaces
What it is:
A clean edge cut directly into the soil with a spade.
Pros:
- Beautiful and understated
- Inexpensive
- Flexible and adjustable
- Blends seamlessly into the garden
Cons:
- Requires periodic maintenance
- Can soften over time
Verdict:
Often the most elegant option—especially in softer, more natural gardens.

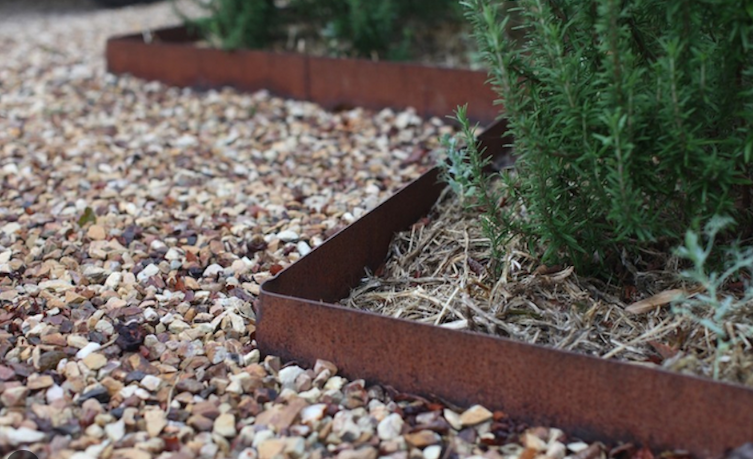
2. Metal Edging (Steel or Aluminum)
Best for: Modern, formal, or long-lasting designs
Pros:
- Clean, crisp lines
- Very durable
- Low visibility when installed properly
Cons:
- Higher upfront cost
- Installation takes effort
- Less forgiving to adjust later
Verdict:
Ideal if you want permanence without visual heaviness.
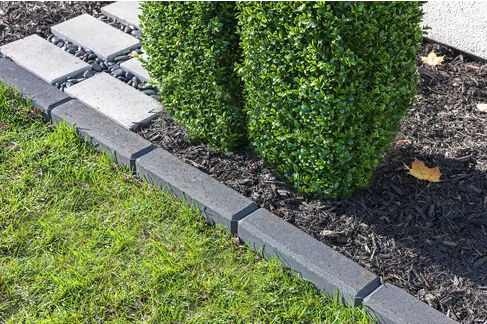
3. Stone, Brick, or Concrete Edging
Best for: Formal gardens, pathways, raised beds
Pros:
- Extremely durable
- Strong visual presence
- Can match architectural elements
Cons:
- Labor-intensive
- Higher cost
- Less flexible
Verdict:
A design feature in its own right—not just an edge.
4. Plastic or Rubber Edging
Best for: Budget-conscious or practical solutions
Pros:
- Affordable
- Easy to install
- Flexible for curves
Cons:
- Can look artificial
- Less durable over time
- May shift or become visible
Verdict:
Functional—but often not the most beautiful option.
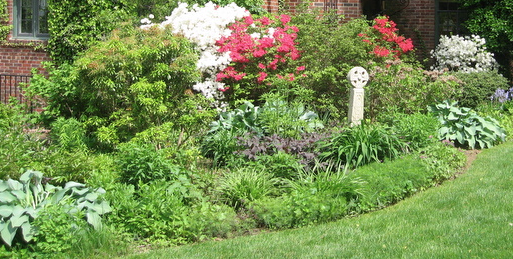
5. No Edge (Blended Edge)
Best for: Wild, naturalistic, or meadow-style planting
Pros:
- Soft, organic feel
- No installation required
Cons:
- High maintenance
- Can quickly look messy
Verdict:
Works only when carefully managed—or intentionally wild.
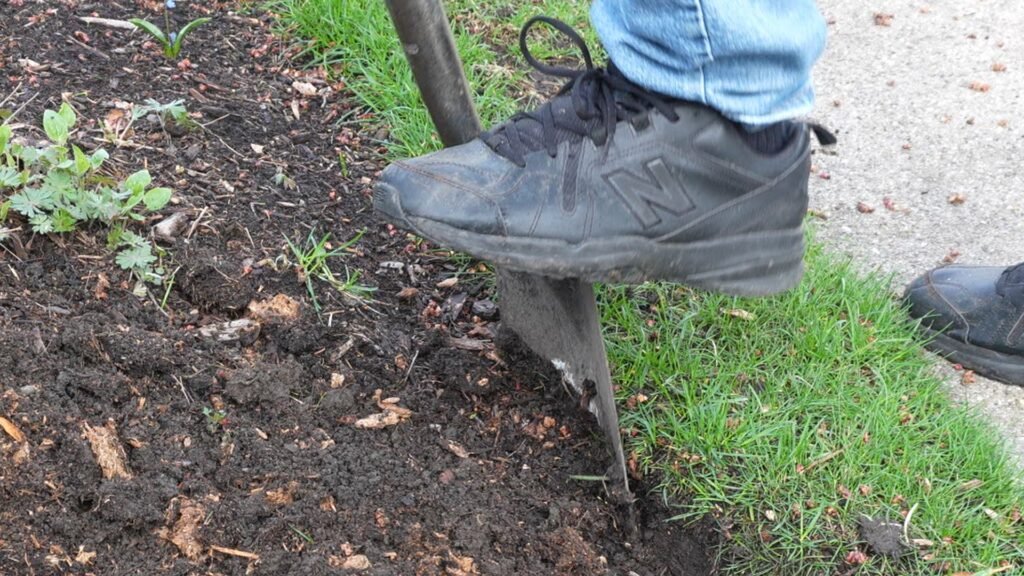
How to Edge a Garden Bed Properly (Step-by-Step)
Step 1: Mark the Line
Use a hose, rope, or even spray paint to define your shape.
Take your time here. This is the foundation of everything.
Step 2: Cut the Edge
Using a sharp spade:
- Cut straight down along the line
- Keep movements clean and deliberate
Step 3: Angle the Cut
Tilt the spade slightly toward the bed.
This creates the beginning of a trench.
Step 4: Remove the Turf Strip
Lift out the strip of grass and soil.
Keep the edge clean—this is where the crispness comes from.
Step 5: Create the Trench (The Critical Detail)
This is the step most people skip.
A shallow trench along the edge creates a shadow line that visually separates lawn from bed.
Without it, the edge quickly softens.
With it, the line holds.
Step 6: Refine and Step Back
Walk the line. Look at it from a distance.
Adjust anything that feels slightly off.
Because you’re not just cutting soil—you’re shaping how the garden is perceived.
Installing Physical Edging (If You Go That Route)
If you’re using metal, plastic, or stone edging, the process is more involved:
- Mark the layout
- Dig a trench to the required depth
- Install the edging material
- Secure it (stakes, joints, or base layers)
- Backfill soil and compact
The principle is the same:
Define → Create space → Install → Refine
Common Mistakes to Avoid
These are the things that instantly give edging away:
Wobbly Lines
Too many small adjustments = visual confusion
Cutting Too Shallow
The edge disappears quickly
Skipping the Trench
No shadow line = no definition
Overcomplicating It
Using materials where a simple edge would look better
Ignoring the Context
Forcing straight lines into soft, natural spaces (or vice versa)
Edging Around Trees (And Avoiding a Common Problem)
When edging around trees, keep the line simple and generous.
But more importantly—avoid the temptation to pile mulch up around the trunk.
The so-called “mulch volcano” might look tidy, but it can:
- Trap moisture against the bark
- Encourage rot
- Lead to root problems over time
Instead:
- Keep mulch flat
- Leave space around the base of the trunk
- Let the tree breathe
When Is the Best Time to Edge?
Timing makes a difference.
Ideal Conditions:
- Early spring
- After light rain (soil is workable, not dry)
Avoid:
- Bone-dry soil
- Frozen ground
- Rushing the job
Maintenance: The Reality
A natural edge is not permanent.
It will soften. Grass will creep back.
But once the line exists, maintenance is simple:
- Light touch-ups every few weeks during the growing season
- A full re-edge 2–3 times per year
Think of it not as a task—but as part of the rhythm of the garden.
The Real Purpose of Edging
Edging isn’t about perfection.
It’s about intention.
It’s the quiet structure that holds everything else together.
The line that gives meaning to the planting.
The boundary that tells the eye where one space ends and another begins.
It doesn’t shout.
But without it, something always feels slightly unresolved.
And with it—everything settles into place.
Watch the Video
Edging is one of the simplest jobs in the garden—but it’s also one of the most transformative. In this video, I show how to edge garden beds properly using a simple spade technique, and why that single line between lawn and planting makes such a difference.
From shaping smooth, natural curves to creating the crisp trench that gives a clean, finished look, this is a practical, step-by-step guide you can apply in any garden.